 So hot--it was 101 degrees over Labor Day weekend.
Back to more chicken house construction! Another door from the dump was cut down and used for the back wall of the chicken house....all this while, I've been wondering if I should have made a small chicken door on the back side, but that was where I wanted to place nest boxes--along the low back wall. I painted and caulked this back wall piece, then topped it off with 2 x 4 scrap.
I drug that pale aqua shelf thingy out the shed, (laying there in the grass), but it really didn't fit anywhere...Back it goes! (I found it in the neighbors trash and painted it. I guess I'll use it in the garage.)
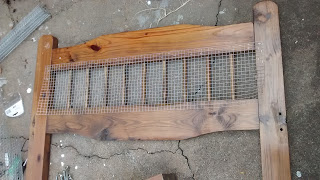
Next, pieces of old Masonite were tacked to the sides—I used the papery cloth I tore from the mattress support for a pattern before I actually sawed these boards. I still sorta messed up the sides—wishing I would have leveled off the entire head and footboard and gotten rid of those curves. I should have just sawed them straight across when the whole bed frame was apart and the entire project would of been much easier. 2 x 4 side supports are added at the top to support the roof and the Masonite.

Next, pieces of old Masonite were tacked to the sides—I used the papery cloth I tore from the mattress support for a pattern before I actually sawed these boards. I still sorta messed up the sides—wishing I would have leveled off the entire head and footboard and gotten rid of those curves. I should have just sawed them straight across when the whole bed frame was apart and the entire project would of been much easier. 2 x 4 side supports are added at the top to support the roof and the Masonite.

There's door framing scrap board (nails removed!) across the top front and a 2 x 2 behind
it. This seems pretty sturdy. Did I mention that the original bunk bed was not
‘square’ at all?! Some of the wood pieces were slightly warped—right out of the
kit. That always irritated me…I didn’t even bother using a level for this
chicken house—I mean it’s just for chickens, right? So all parts are
‘eyeballed’! More 2 x 4s were attached from the high front to the low back--I needed something to attach that Masonite to, plus it will support the roof. I did remember to cut the angles at each end before I screwed it in place! I guess I already mentioned that, huh!? Here's a piece of the outer wall plywood, which I added the next day.
More to come!
More to come!

I next decided to make some shutters to hide the hardware cloth windows. I used the free hinges, scrap wood/old thick paneling scrapwood pilfered at the dump. They raise up and I plan on using eye hooks or bungee cord to hold them up on hot summer days and nights. These were also painted, then screwed on.


