Wednesday, October 7, 2015

Cheap Twin Bed Chicken House, part 4


Remember that I had a plan for the mattress support? Here it is with the paper cloth torn off. Two of the boads were removed so I could saw this into a right and left door...I screwed the wood pieces back onto each door once I measured the size.
After that, I pulled out that free shower board and placed it along the bottom half of each door, then hid the seams with some tiny wood scrap and teeny nails. I caulked all the seams, front and back, and painted. The top halves were turned into windows the next day by pre-drilling some plexiglass and carefully screwing it in place--yes I cracked a corner somewhat!

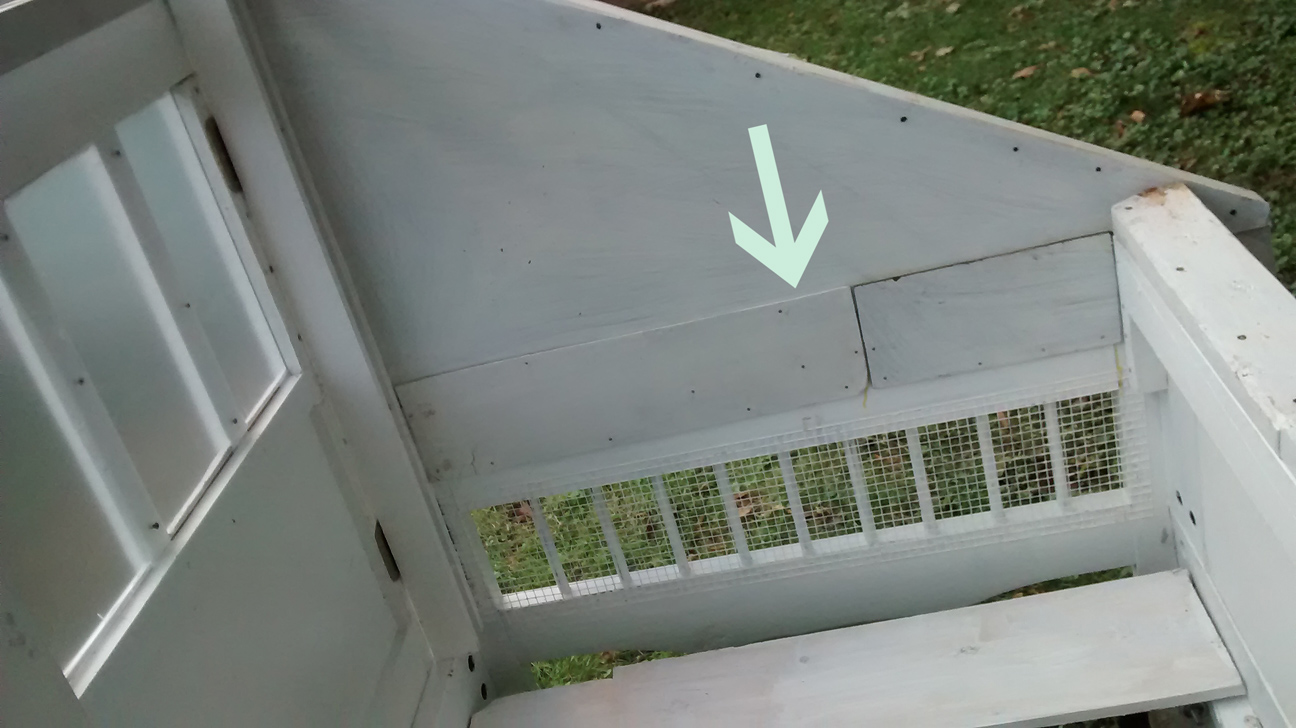
Later, I cut some styrofoam down to create a bit of insulation, then tacked it in place--some more masonite went over the top. More rectangular masonite scrap went into the inside, to hide the curvy headboard space.  I'll explain that roof later...sometimes I work on many parts at once. Here is the side shutter attached with the hinges.


Lastly, here is a view with the doors hinged on.


Saturday, September 12, 2015

Cheap Chicken Coop from Bed; part 3.


So hot--it was 101 degrees over Labor Day weekend.
Back to more chicken house construction! Another door from the dump was cut down and used for the back wall of the chicken house....all this while, I've been wondering if I should have made a small chicken door on the back side, but that was where I wanted to place nest boxes--along the low back wall. I painted and caulked this back wall piece, then topped it off with 2 x 4 scrap.
 I drug that pale aqua shelf thingy out the shed, (laying there in the grass), but it really didn't fit anywhere...Back it goes!  (I found it in the neighbors trash and painted it. I guess I'll use it in the garage.)

Next, pieces of old Masonite were tacked to the sides—I used the papery cloth I tore from the mattress support for a pattern before I actually sawed these boards. I still sorta messed up the sides—wishing I would have leveled off the entire head and footboard and gotten rid of those curves. I should have just sawed them straight across when the whole bed frame was apart and the entire project would of been much easier. 2 x 4 side supports are added at the top to support the roof and the Masonite.

 There's door framing scrap board (nails removed!) across the top front and a 2 x 2 behind it. This seems pretty sturdy. Did I mention that the original bunk bed was not ‘square’ at all?! Some of the wood pieces were slightly warped—right out of the kit. That always irritated me…I didn’t even bother using a level for this chicken house—I mean it’s just for chickens, right? So all parts are ‘eyeballed’!  More 2 x 4s were attached from the high front to the low back--I needed something to attach that Masonite to, plus it will support the roof. I did remember to cut the angles at each end before I screwed it in place! I guess I already mentioned that, huh!? Here's a piece of the outer wall plywood, which I added the next day.
More to come!


I next decided to make some shutters to hide the  hardware cloth windows. I used the free hinges, scrap wood/old thick paneling scrapwood pilfered at the dump. They raise up and I plan on using eye hooks or bungee cord to hold them up on hot summer days and nights. These were also painted, then screwed on.

Thursday, September 10, 2015

Chicken House From a Twin Bed--DIY, Part 2.


Lucky me! When I took branches and leaves to the dump a few weeks ago, someone had illegally dropped off 3 doors and their framing, many pieces of plywood, Masonite? (that pressed dark brown stuff), some shower board (slick on one side), and various 2 x 4s and lumber. I loaded it up and brought it home!!!
I also had quite a bit of 2x4 odds and ends from a construction site near my son’s place. When I visited him, I’d check the dumpster and grab what I could!  Some pieces where almost 6’ long! Another thing I do is take scrap wood out of the trash at Menard's while I shop and throw it at the bottom of my cart--then say "This wood was in your trash--can I have it?" The checkers always say "Yes".
I cut one of the free doors for the floor of my chicken coop. (I had plans for the original mattress support.) I had to cut it a couple times to get it to fit—I’m not that great with a saw! I did put some narrow wood strips/scraps back into the cut sides of the door—using wood glue and clamps—have you ever seen what is inside a cheap door??! Nothing but air and cardboard, ugh.
Leftover Kilz  primer was painted on—I tried to paint all the pieces as I created them. I had this old dresser drawer saved and after tacking in some tiny strips along the back, I slid a piece of ¼” plywood down the center to divide it into 2 nest boxes. I’m glad I didn’t paint it white yet, because it just seemed too big. My backyard neighbor had a broken chest of drawers in her trash—I salvaged it for smaller, easier-to-move nest boxes and the dresser's side was cut narrower for a chicken ladder--watch for nails when sawing! Scroll all the way down to see the ladder...

The nest boxes were shortened even more, making them roughly 14 x 14”; I just glued, nailed and clamped the rear board back on. These will be easier to pick up for cleaning later, individually. I borrowed clamps from our Woods teacher.
Pinterest had lots of ‘chicken tractor’ ideas, so I knew I wanted tires. An old lawnmower hidden in the hydrangea bushes was yanked out for its wheels. I got three off with a mere modicum of cussing, but the 4th was a killer.  WD-40 didn’t work, even hrs later-- I stripped the hex nut and got blood blisters. My neighbor wrenched it off next day—I guess I loosened it for him! I drilled holes and fastened them under the bed so I could push/pull it. Warning! It only pulls straight forward/backward—I wished it swiveled! I had 4 rollers off a desk chair, but was afraid they'd be too weak.

Some 3 x 3” posts (part of a palette?) were attached to the ‘front’ of the bed—one thing I regret is not sawing them off at an angle BEFORE. It would have made the roofing so much easier later…. Oh well.
 Stay tuned for the next section of Twin Bed Chicken Coop!...http://diederichtrashcraft.blogspot.com/2015/09/cheap-chicken-coop-from-bed-part-3.html


Wednesday, September 9, 2015

Twin Bed Chicken Coop--Nearly Free!


Alright folks, I am a scrounger. A finder of treasures and a keeper of assorted junk. Out on a walk one day, I had a friend slap a rusty washer out of my hand because I “didn’t need any more crap”! Now, I’ve been inside a hoarder’s home years ago, so I do my best to NOT get myself into that state. But I’m also an art teacher and I appreciate a good find, recycled objects, and anything with an old texture. It’s fun to make something from nothing!
Here’s a brief ‘tutorial’ on how to make a (nearly) free chicken coop…
My son had the bottom half of a wooden bunk bed upstairs AND a wooden futon. Needing to get rid of one (in order to store 2 recently acquired dressers!), I opted to take apart the twin wooden bed. Once apart, I hauled the pieces to the back yard.

First, I decided to staple in some hail screen. I'd bought a couple items at a garage sale across the street and the nice lady threw in a partial roll of hardware cloth for free. I also had some window screen in the garage, but it wasn't as coon-proof or sturdy.

 
Thinking that the length of a twin bed might be too long for my yard, 16” were cut off the side pieces and then I screwed it back together; pre-drilling seems to work better for me, so I pre-drilled almost everything. I had a box of long screws and a box of drywall screws from other projects.  I then screwed the left-over pieces to the ‘back’ of my envisioned chicken house, standing them on end to form a low wall.

Saturday, August 15, 2015

Mini Shag Rug, Homemade

I had a bag of clothes, ready to go to Goodwill, but I rescued some to create this little bathroom rug. The rug backing is cut from a heavy sweatshirt; the rest of it is just 1" wide fabric and t-shirt strips--gray/khaki/orange/aqua/brown floral, aqua floral. The strips were cut about 3 1/2-4" long and zigzagged on in rows. Very easy.
And what do you think of this impressive, $6.00 antique animal carrier?? I think I'll weave fabric strips in and out of it and make a little unique suitcase--it should fit as carry-on!


Wednesday, February 5, 2014

Strip Quilt in Pinks

I've been influenced by Pinterest quilts, so I've been digging through old and new fabrics and trying to use up a lot of what I had...I am running low on light colors due to this...
I've almost got an entire quilt sewed together today! I think I have 13 rows...too many. Maybe a strip across the backside??

Sunday, June 9, 2013

Red Painted Furniture

Here's a couple more 'asian/Horchow' inspired pieced--a nightstand and a little jewelry box. Both match the chest of drawers below. I like the red, but I think most people preferred the light turquoise color previously used on the other painted furniture. Is it because our school colors are red? And people are tired of it? Too bold? Hmmm.